You will receive an email when your order departs from the warehouse. You can also check the status of your order by logging into your account.
No, care of PO Box addresses and military APO addresses are not accepted.
Contact us as soon as possible and we’ll try: +27 31 266 0620 or email [email protected]
At this time Gregory Mountain Products does not offer international shipping.
Click “Order Status” at the top of this page or just follow this link: click here
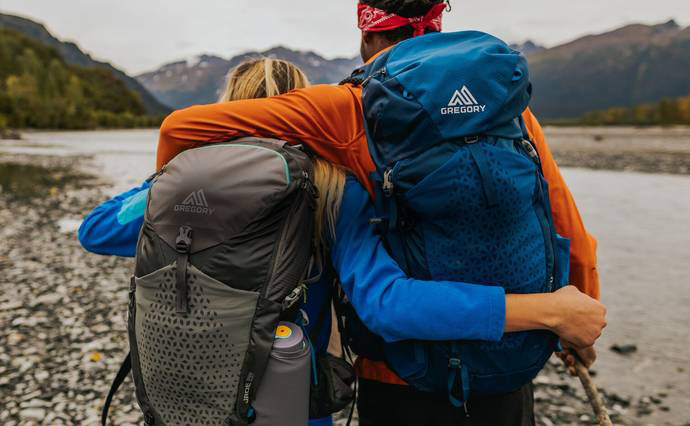
All of our women’s packs are designed to fit the anatomy of the female body. This means a hipbelt angled to fit the shape of a woman’s hipbones and a shoulder harness that is shaped to work with a woman’s bust and allow for a smooth wrap over the shoulder. We also provide smaller torso lengths in women’s packs to accommodate shorter women, as proper torso length is a key element to achieving the best fit.
We have two different adjustable torso designs on our packs. The first is a hook-and-loop attachment that can be separated and repositioned according to marks on the adjustable panel. Make sure to press and massage the attachment back together after adjusted. The second adjustable design is in the Response A3 suspension found on the Baltoro/Deva and Denali. The Response A3 shoulder harness can be attached in two positions in the backpanel, allowing 2 inches (5cm)of adjustment within each size. To adjust, flatten the toggles on the harness straps and pass them through the slots to remove them, then reverse the procedure to pass them through the second set of slots, keeping the toggles flat. Once through, flip the toggles so that they lie flat against the plastic assembly.
For packs with hipbelt adjustment, the process is very similar to the hook-and-loop style of adjustable-torso packs: Simply separate the hook-and-loop panels from each other, and then reposition the belt according to the marks on the pad, ensuring that each side is positioned at the same point for a proper fit.
Sizing yourself for a pack is easy, but it takes a little explanation. Take a spin through our Fit & Sizing page for the full details.
Loading your backpack is a balancing act in the sense that you want easy access to contents in the order you use them on the trail and in camp, and literally in the sense that you want to balance the load to maintain your center of gravity. Here’s how to do it, starting from the bottom of your pack:
Most backpackers will shove their sleeping bag into the bottom of their packs. On some packs, there is a zippered opening at the bottom of the pack specifically for this purpose. The bottom of the pack is also a good place for items you won’t need until you make camp at night: long underwear being used as sleepwear, for example; a pillow or maybe a sleeping pad if it’s the kind that can pack down instead of folding or rolling up. Any other campsite-only items can go down low, except a headlamp or flashlight—it’s always a good idea to have your light source readily accessible.
Your heaviest items should be placed 1) on top of your sleeping bag or other items at the bottom of the pack and 2) close to your spine. Usually, these items will be:
Heavier items should be centered in your pack—not too high, not too low. The goal is to create a predictable, comfortable center of gravity. Heavy items too low cause a pack to feel saggy. Too high and the load might feel tippy.
Wrap softer, lower-weight items around the heavier items to prevent heavier pieces from shifting. Your tent body, rainfly, an insulation layer, or a rain jacket might work well. These items help stabilize the heavier core by filling empty spaces.
Stash frequently used items in easy reach: This includes your map, compass, GPS, sunscreen, sunglasses, headlamp, bug spray, first-aid kit, snacks, rain gear, pack cover, toilet paper, and sanitation trowel. Place them in the pack’s top pocket or another external pocket, if one exists. Many backpacking and trekking packs include small pockets on the hipbelt for trail snacks and accessories.
The Pro Raincover is available in 5 sizes. The list below shows the corresponding pack liter size to match with the correct size. If you’re on the edge of a size, we recommend going with the larger size to ensure a proper fit.
We provide a maximum recommended carry weight on each individual product page. The max carry amount is based on the pack’s backpanel, harness, and support structure. Some packs are designed with the ability to carry more weight than others, even if the pack liter sizes are different.
Check out the Specs Tab on each product page for more info, and feel free to contact us if you have any additional questions.
Ideally, we recommend carrying your pack on the plane to avoid damage in transit; however, carry-on baggage must fit easily in the Carry-on Baggage Check (approximately 22″ x 14″ x 9″ or 56 x 35 x 23 cm), which is usually located near the check-in counters. Typically, packs over 40 liters are too big to carry on, although this also depends on how full you pack the bag. If you are checking a large backpack (Such as a Baltoro/Deva), you can put the backpack in a duffel for protection, use a bag-wrapping service in the terminal, or sometimes airlines offer plastic bags for free or for a small fee. If you have nowhere to leave a duffel but you want to bag your pack, we suggest putting it in a heavy-duty clear plastic ‘contractor’ bag and then using duct tape around the bag to minimize free space and loose ends. But don’t throw it away—you can carry it with you or stash it somewhere at your destination without too much concern, then use it again for the flight home.
Yes, the 3D Hydro Reservoir is both BPA and PVC free.
Most airlines follow dimensions of approximately 22″ x 14″ x 9″ or 56 x 35 x 23 cm. Packs with dimensions that fall at or below those dimensions should work for most airlines. It’s always a good idea to review the specific airline for exact dimensions.
Gregory guarantees that your product will be free from defects in materials or workmanship for as long as you own it. The Gregory warranty does not cover damage due to unreasonable use or improper care. See a full description of the Gregory Lifetime Guarantee here.
Our authorized repair center will evaluate your pack and determine its warranty coverage. You can check your warranty period and create a repair ticket to send your product to an authorised repair centre by clicking here. The repair centre will contact you after evaluation.
In order to request a replacement part for your Gregory backpack, please provide the following information when you contact us:
Please be aware that all requests will be filled subject to availability. If you are able to attach a photo of the needed replacement, it may help expedite your service. It is important to be as descriptive as possible, as “black buckle” will typically not be enough to determine which black buckle you need.
These swappable components are available from us, or sometimes from our authorized dealers – please provide your request details and size requirement on our Contact Us page.
FREE DELIVERY & RETURNS for orders over R1000 anywhere in South Africa. Details
We will use all reasonable efforts to deliver the products ordered within the timescales indicated on the individual order confirmation to the User. Such timescales are estimates; they are not guaranteed delivery times and should not be relied upon. Erroneously communicated addresses are the responsibility of the User and may lead to extra charges that will be recovered from the User. All goods will be dispatched from Gregory. If your product is not delivered within the specified timescale, please contact us with your client number or order number. If you have not received any item you ordered after 30 days from the date of the Shipping Notification E-mail, you will have the option to cancel your order and request a full refund. We only ship via a professional courier. We always require someone to sign off for delivery. You accept that a delivery is signed off for by a person other than the User, provided that such person is present at the indicated address and an adult of 18 years or over. If there is no one present at the time of delivery, you will be asked to contact our courier service to arrange an alternative delivery date.
You must check whether your shipment is correct upon delivery. If there are discrepancies or problems with your order, please follow the returns procedure described under “Your right of retraction”, but for faulty goods or goods being returned due to our error we will also refund any cost incurred in returning the item. Subject to availability, we will send you a new Shipping Notification E-mail and we will automatically and immediately ship to you at our own costs the correct replacement product.